
1Field Kit Supplies#
This section contains instructions for building the official 2025-26 ARC Regional Competition Field Kit.
Teams should strongly consider assembling a field kit to practice. If costs are prohibitive, teams are encouraged to build a partial field kit and/or to share a practice field with other teams.
Notes:
- Components are subject to change based on availability. ARC events will use the most similar possible replacement for items as needed.
- STEM-ED INC is not sponsored by nor endorses any of the recommended suppliers, and teams are not required to purchase through the provided links.
| Name | Item | Quantity | Price Total |
|---|---|---|---|
| Payload 1 | Lifesaver | 1 | $9.27 |
| Payload 2 | Turtle | 12 | $32.99 |
| Payload 3 | Whale Tracker | 6 | $19.98 |
| Field Component 1 | Pool | 2 | $29.36 |
| Field Component 2, Red | Swimmer in Red | 1 | $74.96 |
| Field Component 2, Blue | Swimmer in Blue | 1 | |
| Field Component 3, Blue | Blue Whale | 4 | $79.94 |
| Field Component 3, White | White Whale | 4 | |
| Field Component 3, Purple | Purple Whale | 1 | |
| Field Component 4 | Landing Pad | 2 | $15.99 |
| Field Component 5 | Tether | 1 | $16.48 |
| Total | $278.97 |
1.1Materials#
See the table below for a detailed cost breakdown to build a full field. Costs are estimated by their supplier’s listed prices at the time of document release.
![Table 1.2 Materials and Costs. Price Per $13.47 $32.99 $19.98 Price Total $13.47 $32.99 $19.98 Name Description Material Link # Link Link Link Link (or sim.) Link Link Payload 1 (x1) Payload 2 (x12) Payload 3 (x6) Lifesaver Turtle Whale Tracker Lifesaver (5.51”) Stuffed Turtle (Pack of 15) Foam puck (Pack of 6) 1 1 1 Field Component 1 (x2) Pool Inflatable pool $14.68 2 $29.36 Basket (Pack of 50) [Optional] Lead BBs for Weight (or sim.) Board (Leftover from FC3) UltraCote, Red UltraCote, Blue $24.99 $9.99 1 1 0 1 1 $24.99 $9.99 Field Component 2 (Red x1, Blue x1) Swimmer Link Link Link (or sim.) Link Link Link Link (or sim.) Link Link (or sim.) Link $19.99 $19.99 $19.99 $19.99 Plywood, 3/8”x4’x8’ (cut* into 2’x2’ squares) $19.98 2 $39.96 Field Component 3 (Blue x4, White x4, Purple x1) Colored Board UltraCote, Blue (Leftover from FC2), or Paint UltraCote, White, or Paint UltraCote, Purple, or Paint 0 1 1 $19.99 $19.99 $19.99 $19.99 Field Component 4 (x2) L.P. Landing Pad (Pack of 2) $15.99 1 $15.99 Cinder Block $2.50 1 $2.50 Field Component 5 (x1) Tether Polypropylene Cord (90') $7.49 1 $7.49 Carabiner Clip (2 Pack) $6.49 Full Field 1 $6.49 $283.17](/docs/2025-26-Field-Kit-Assembly-Guide-Rev-B/table-1-2.webp)
1.2Tools#
See the table below for the tools needed to build a full field. When multiple links are provided, the first is the cheapest recommendation, while the last is the highest quality recommendation.
| Tool | Examples | Notes |
|---|---|---|
| Measuring Tape | Link | Recommend at least 50’ for measuring tether and field. |
| Writing Utensil(s) | Pen/ Marker/ Pencil | |
| Scissors | Link | Strong enough to cut tether line. |
| Utility Knife | Link | |
| Iron* | Link OR Link | UltraCote iron OR Clothes iron and towel |
| Drill | Link Link Link | Use with 3” hole saw |
| 3” Hole Saw | Link Link |
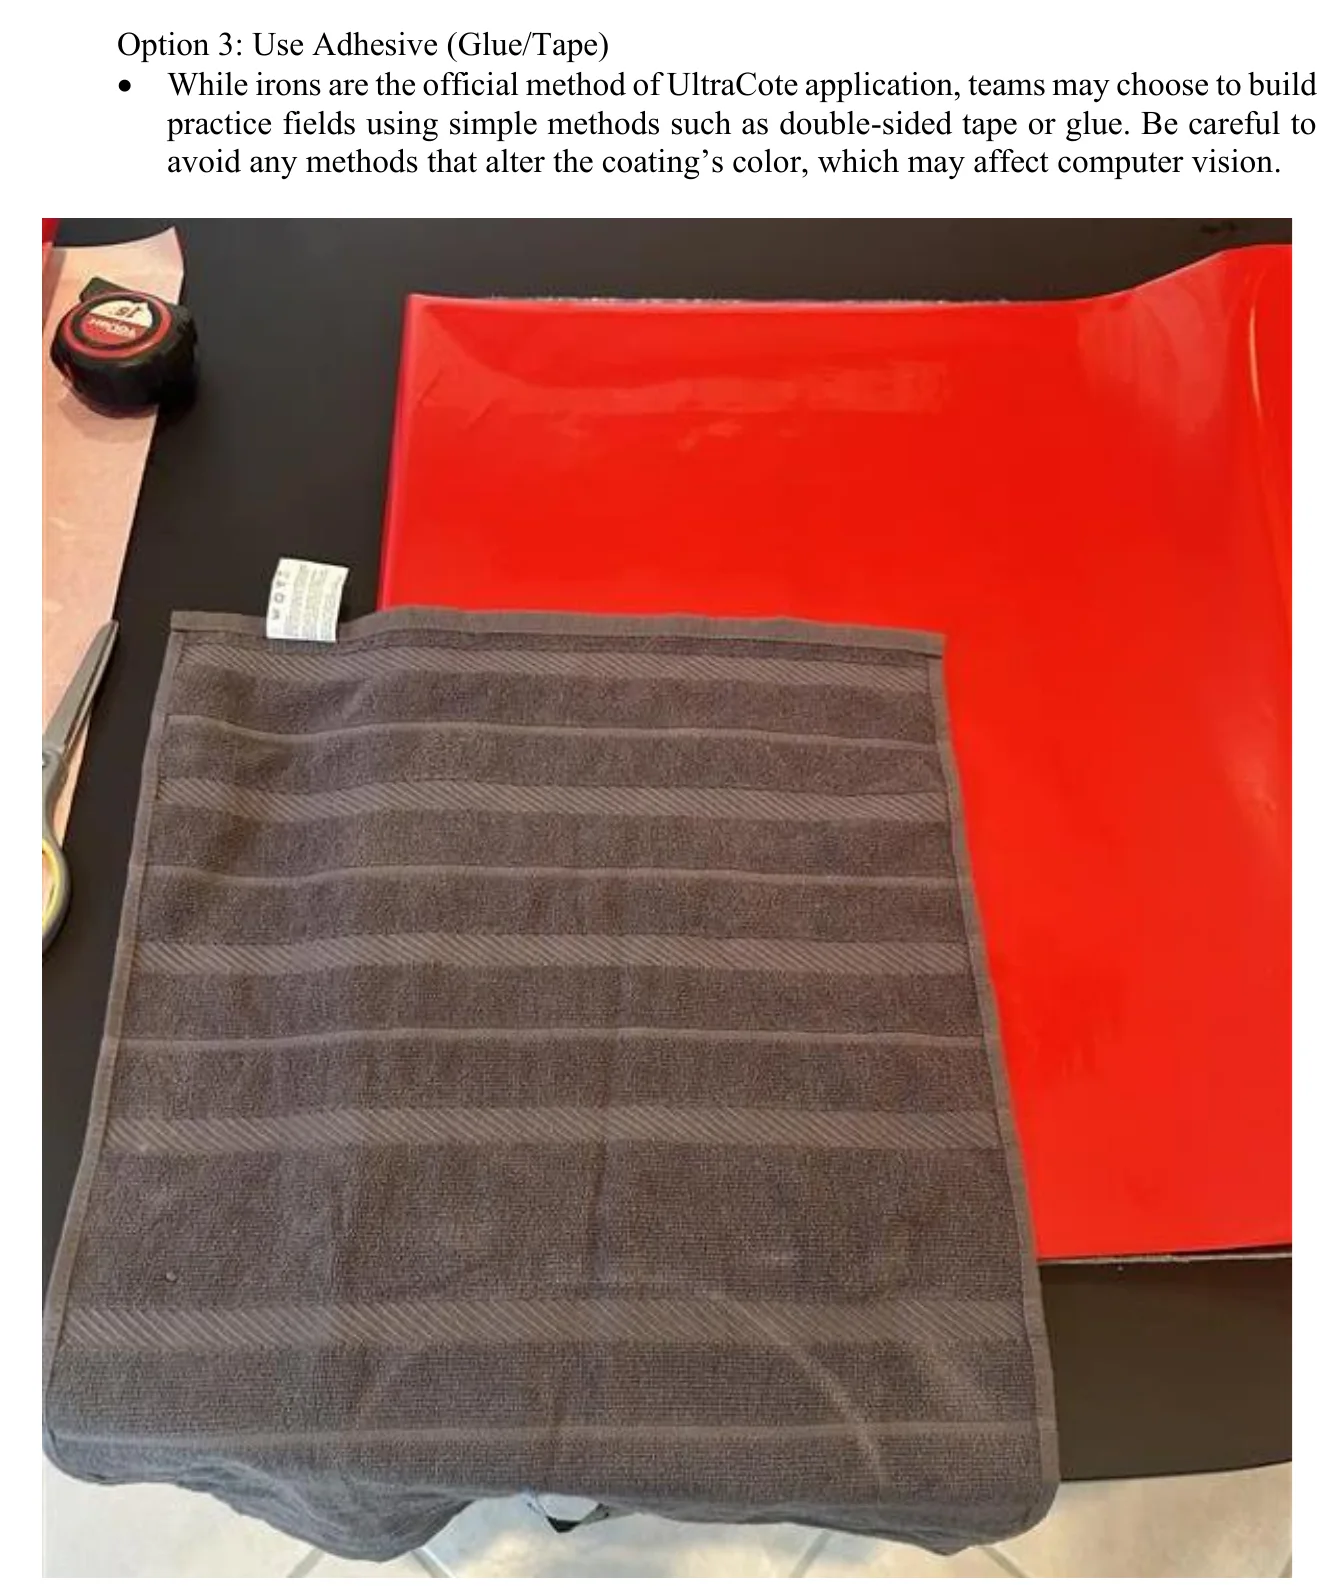
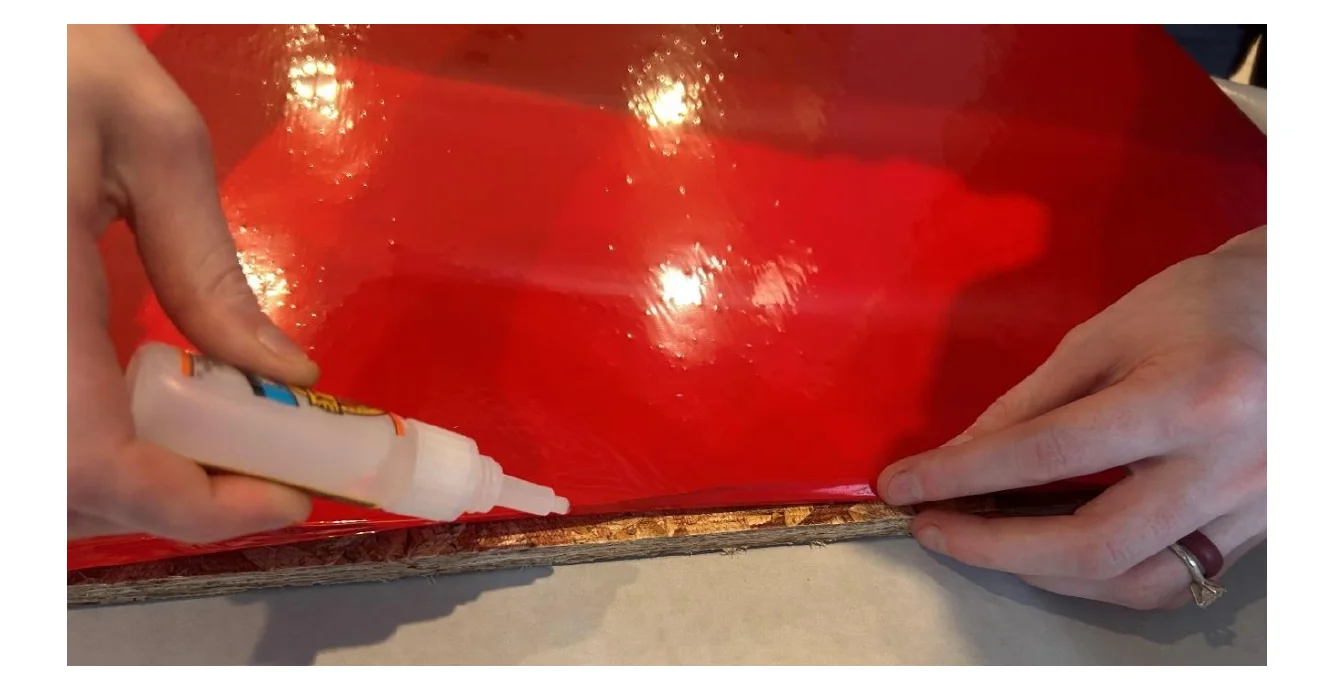
*While irons are the official method of UltraCote application, teams may choose to build practice fields using simple methods such as double-sided tape or glue. Be careful to avoid any methods that alter the coating’s color, which may affect computer vision.
Please remember to use caution while using any sharp or hot tools. We strongly recommend having a coach/supervisor present and working with at least two people.
2Mission 1 Components#
Table 2.1 below indicates the components that will be used in Mission 1. The following subsections will provide instructions for building these components.
| Name | Item | Description | Instructions |
|---|---|---|---|
| Payload 1 | Lifesaver | Lifesaver | NA |
| Field Component 1 | Pool | Pool | NA |
| Field Component 2, Red | Swimmer in Red | Basket & Colored Board | Section 2.1 |
| Field Component 2, Blue | Swimmer in Blue | ||
| Field Component 4 | Landing Pad | Landing Pad | NA |
| Field Component 5 | Tether | Line & Cinder Block | Section 2.2 |
2.1Field Component 2: Swimmer#
The following materials are needed to build 1 swimmer:
- 3/8”x2’x2’ Plywood Sheet x2
- Basket x2
- UltraCote, Red/Blue
The following tools are needed to build 1 swimmer:
- Tape Measure
- Writing Utensil
- Scissors
- Utility Knife
- Drill
- Hole Saw
- Iron (or Adhesive)
2 options are presented. Teams may choose to use either a plain red/blue board with the swimmer located in the center (Option 1) or a board with an ArUco tag representing the color red/blue (Option 2). Both options will be available at the competition venue.
Teams may find this site to be a valuable resource for learning about ArUco tags: docs.opencv.org/4.x/d5/dae/tutorial_aruco_detection.html
OPTION 1: Color
2.1.1Step 1: Drill Hole#
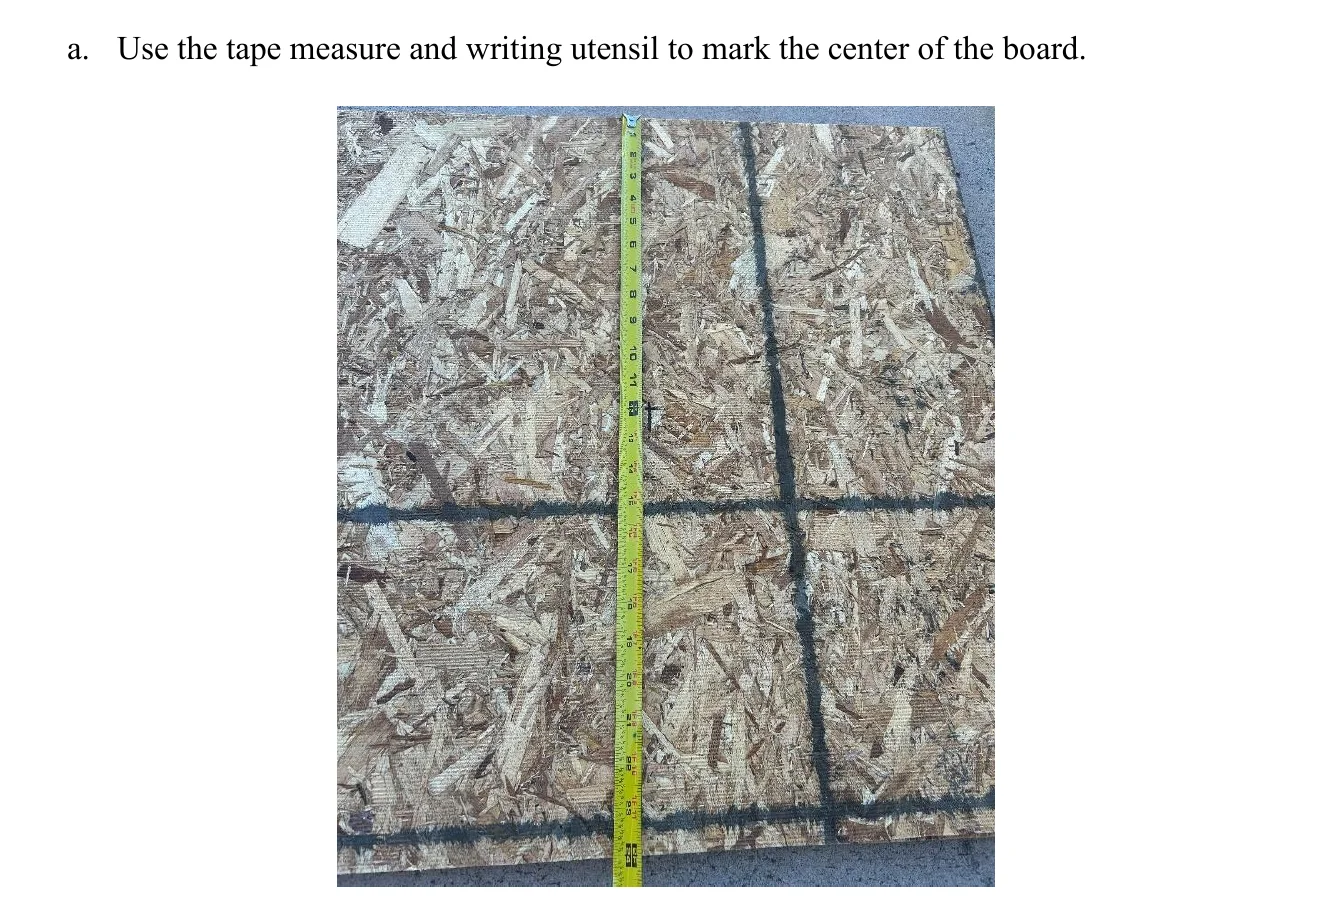
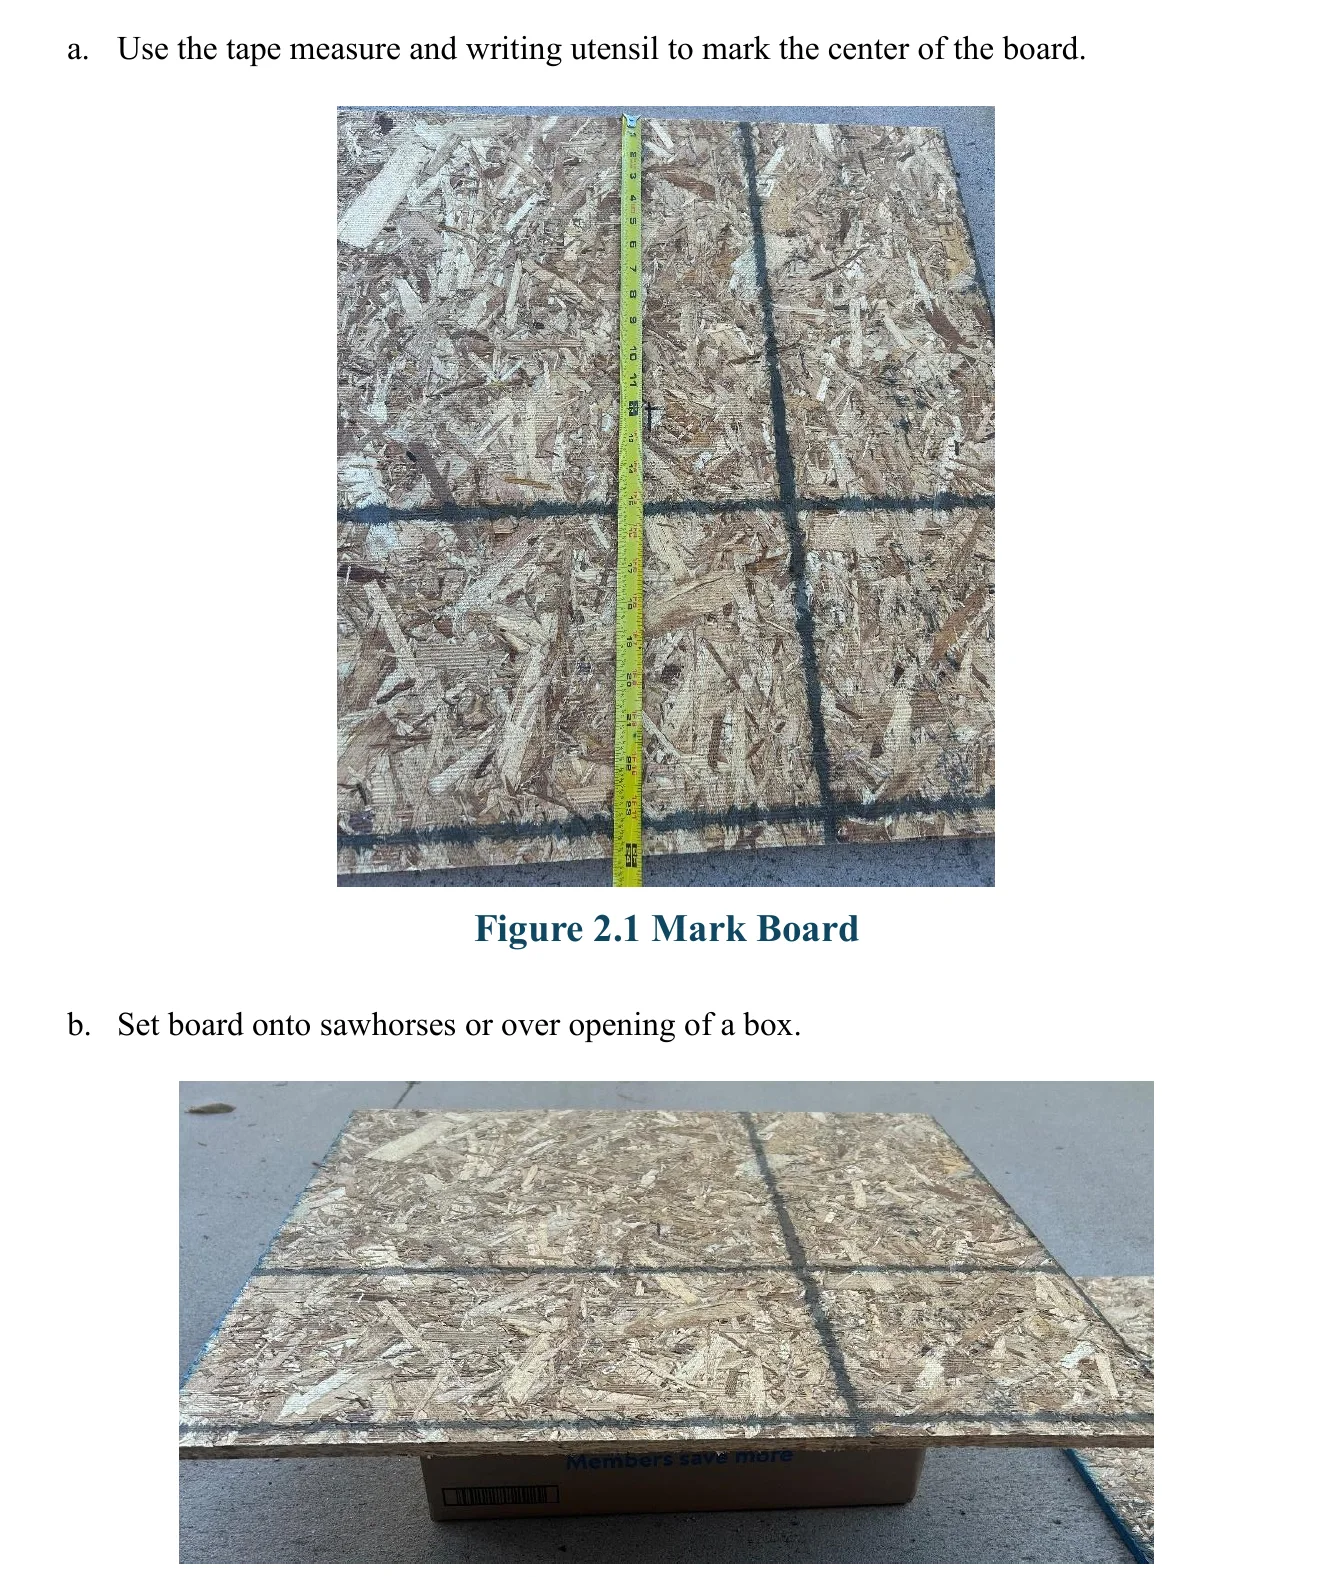
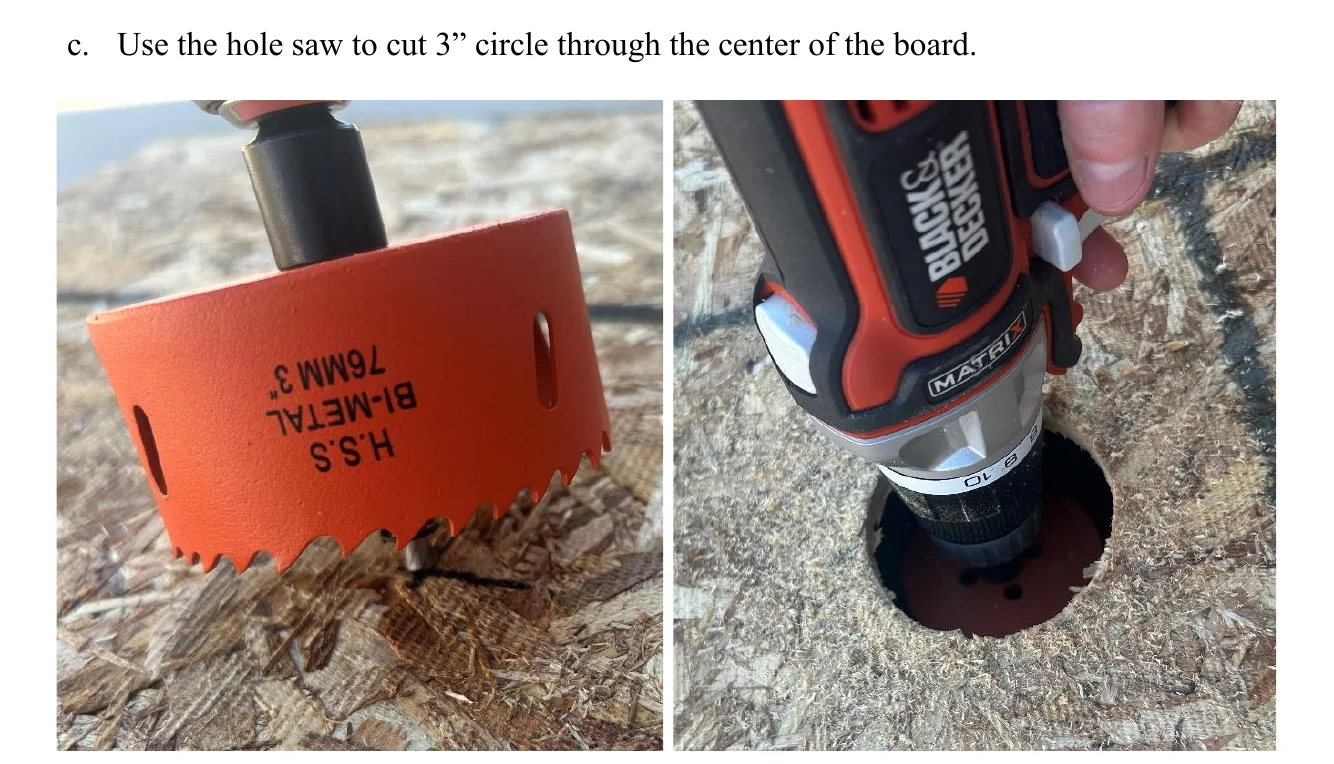
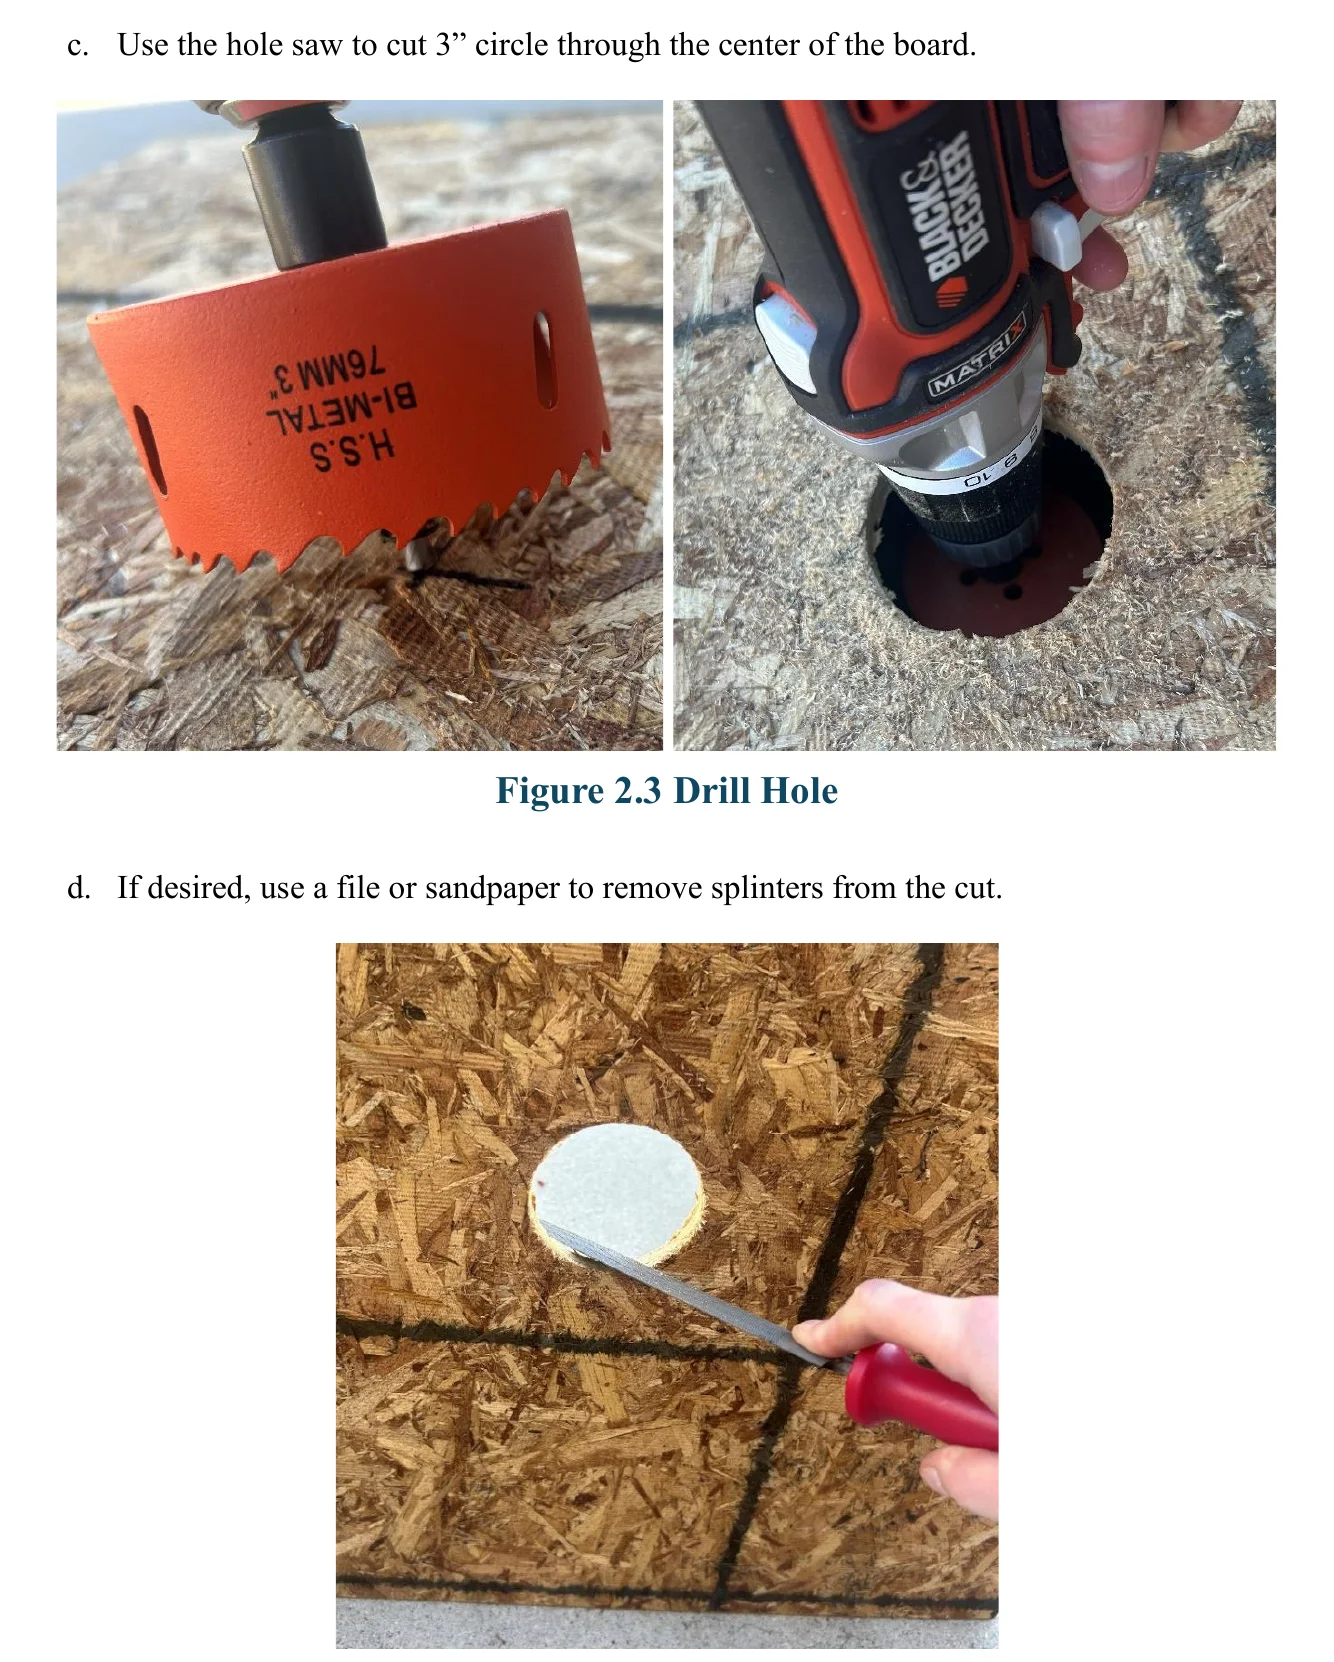
2.1.2Step 2: Apply UltraCote#
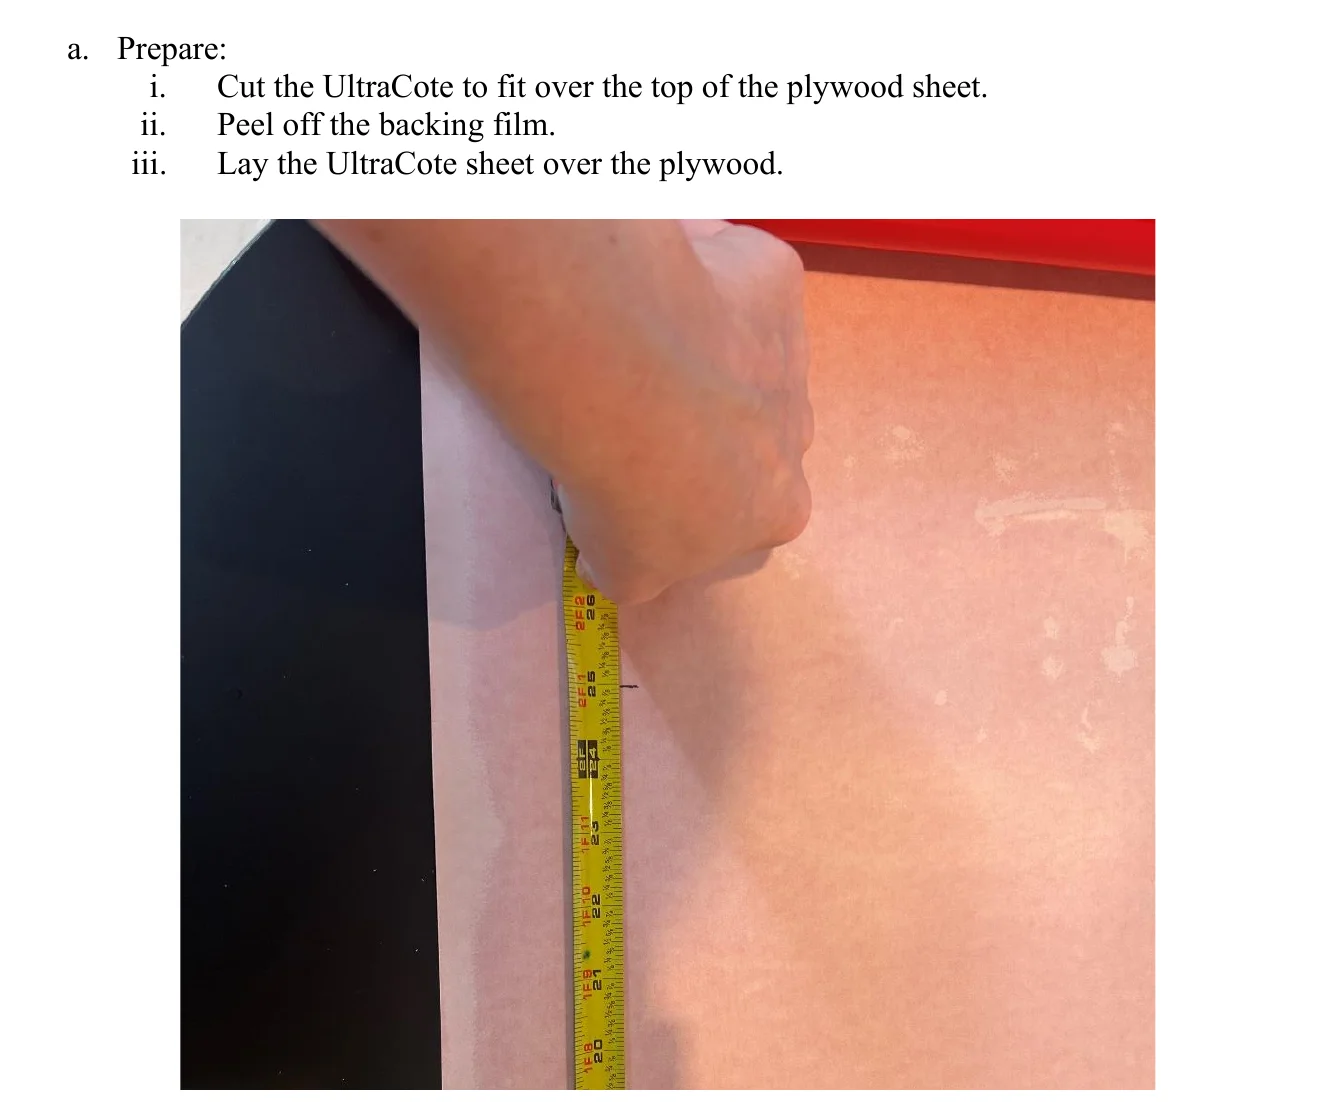
- Apply: Option 1: Use UltraCote Iron
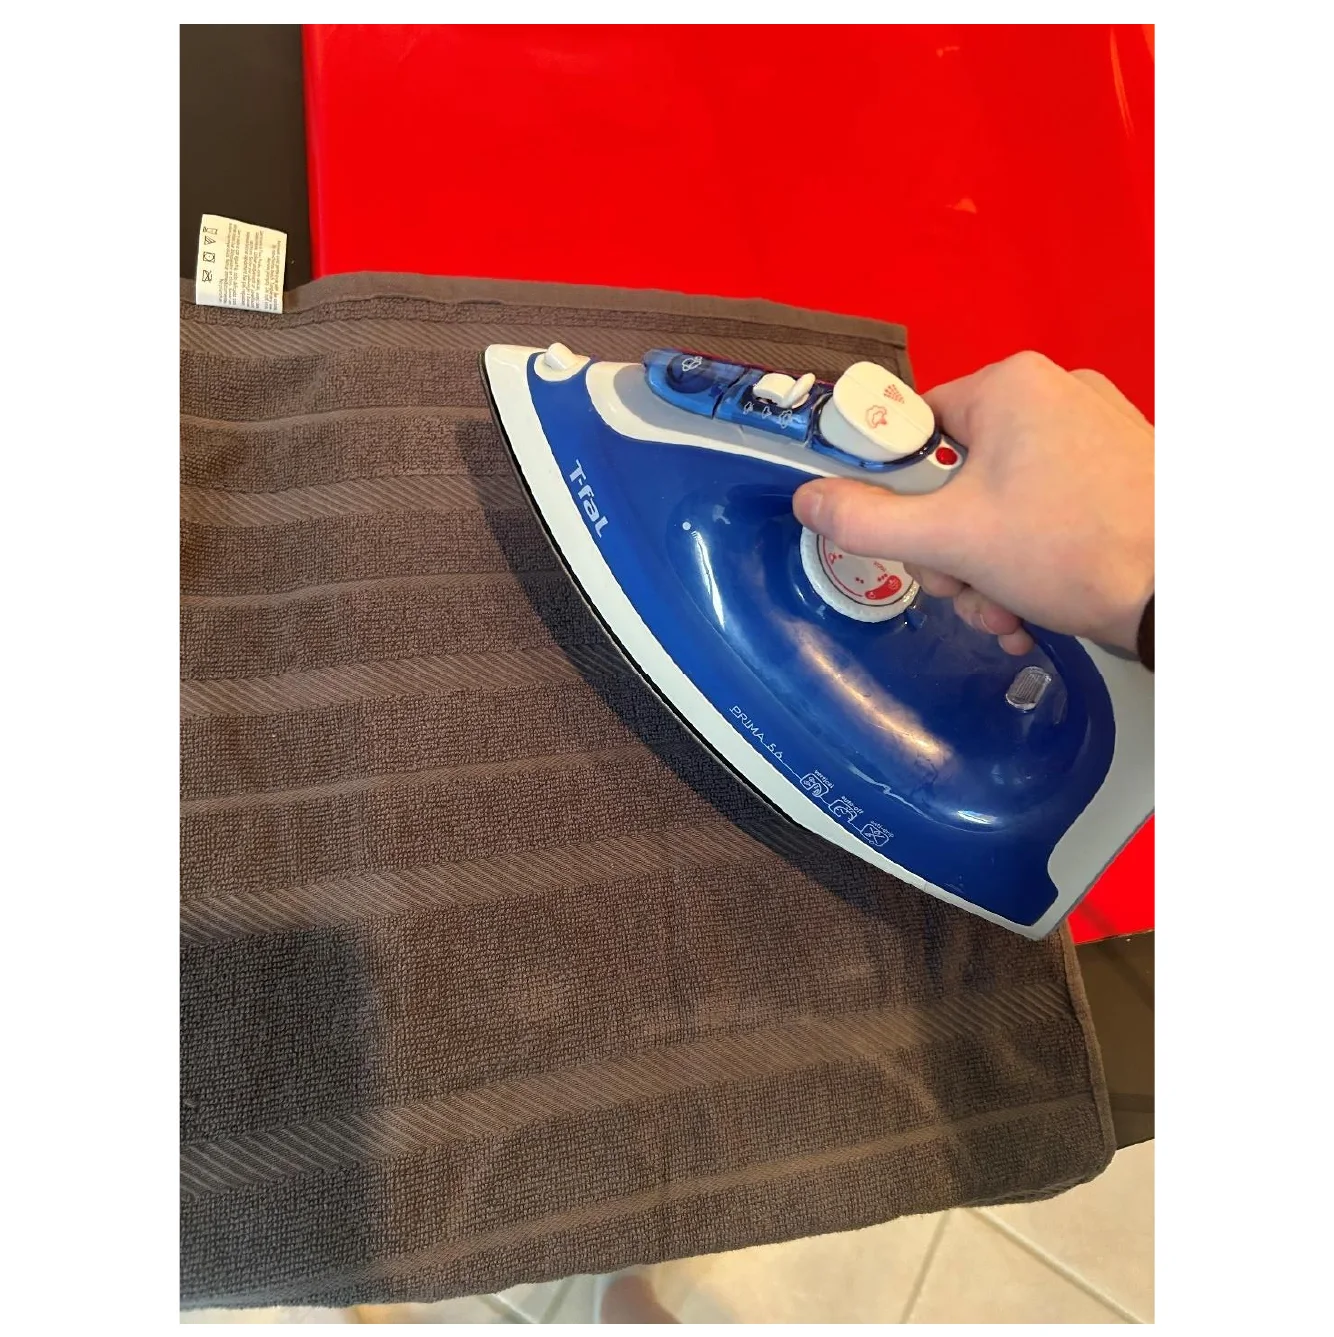
- CAREFULLY use the iron to adhere the UltraCote to the board. Option 2: Use Clothes Iron (Shown in Figures)
- Lay a towel over the UltraCote and board (this will protect the UltraCote from direct contact with the iron).
- Iron the towel as you would iron clothing. The heat will penetrate the towel and activate the adhesive on the UltraCote. o Turn the iron on high heat and slowly iron from one edge of the board across to the other side. Re-iron any areas that are not fully adhered.
2.1.3Step 3: Cut Hole for Basket#
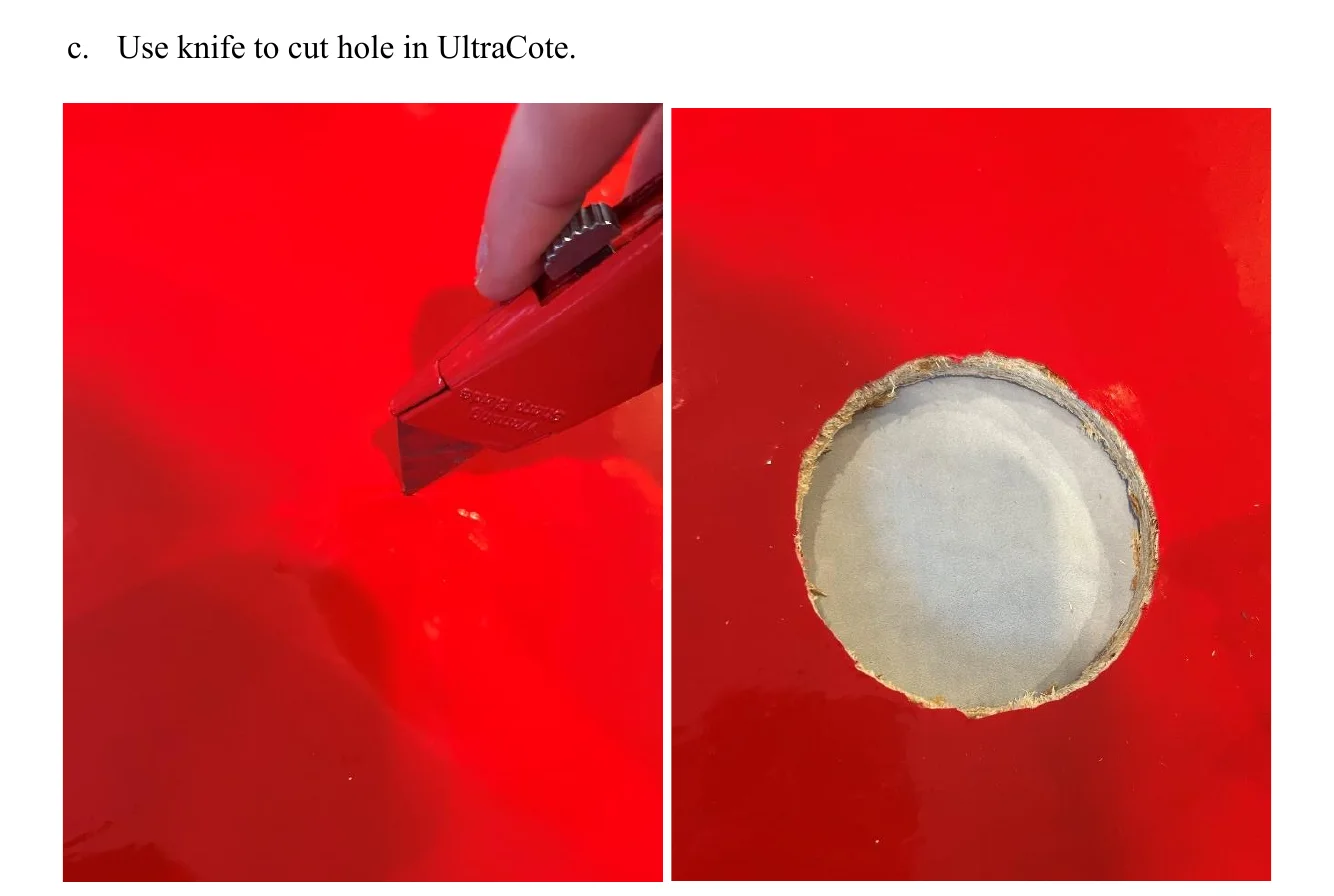
2.1.4Step 4: Insert Basket#
OPTION 2: ArUco Tag
2.1.5Step 1: Drill Hole#
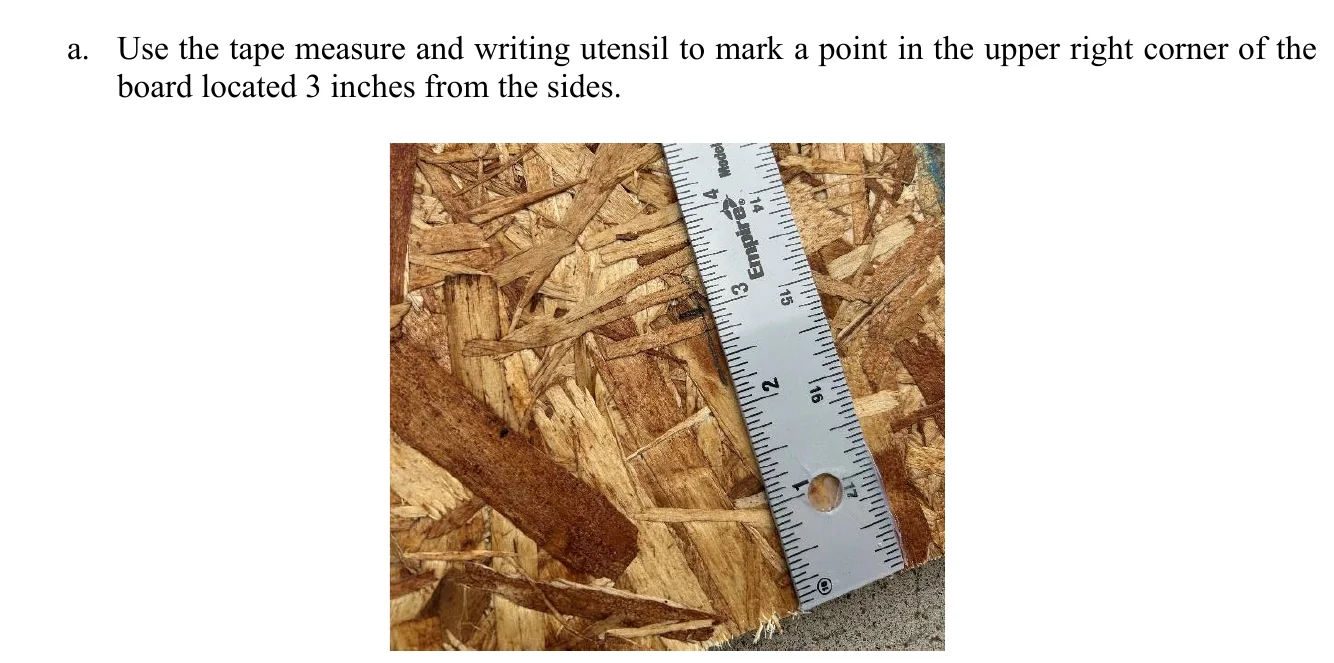
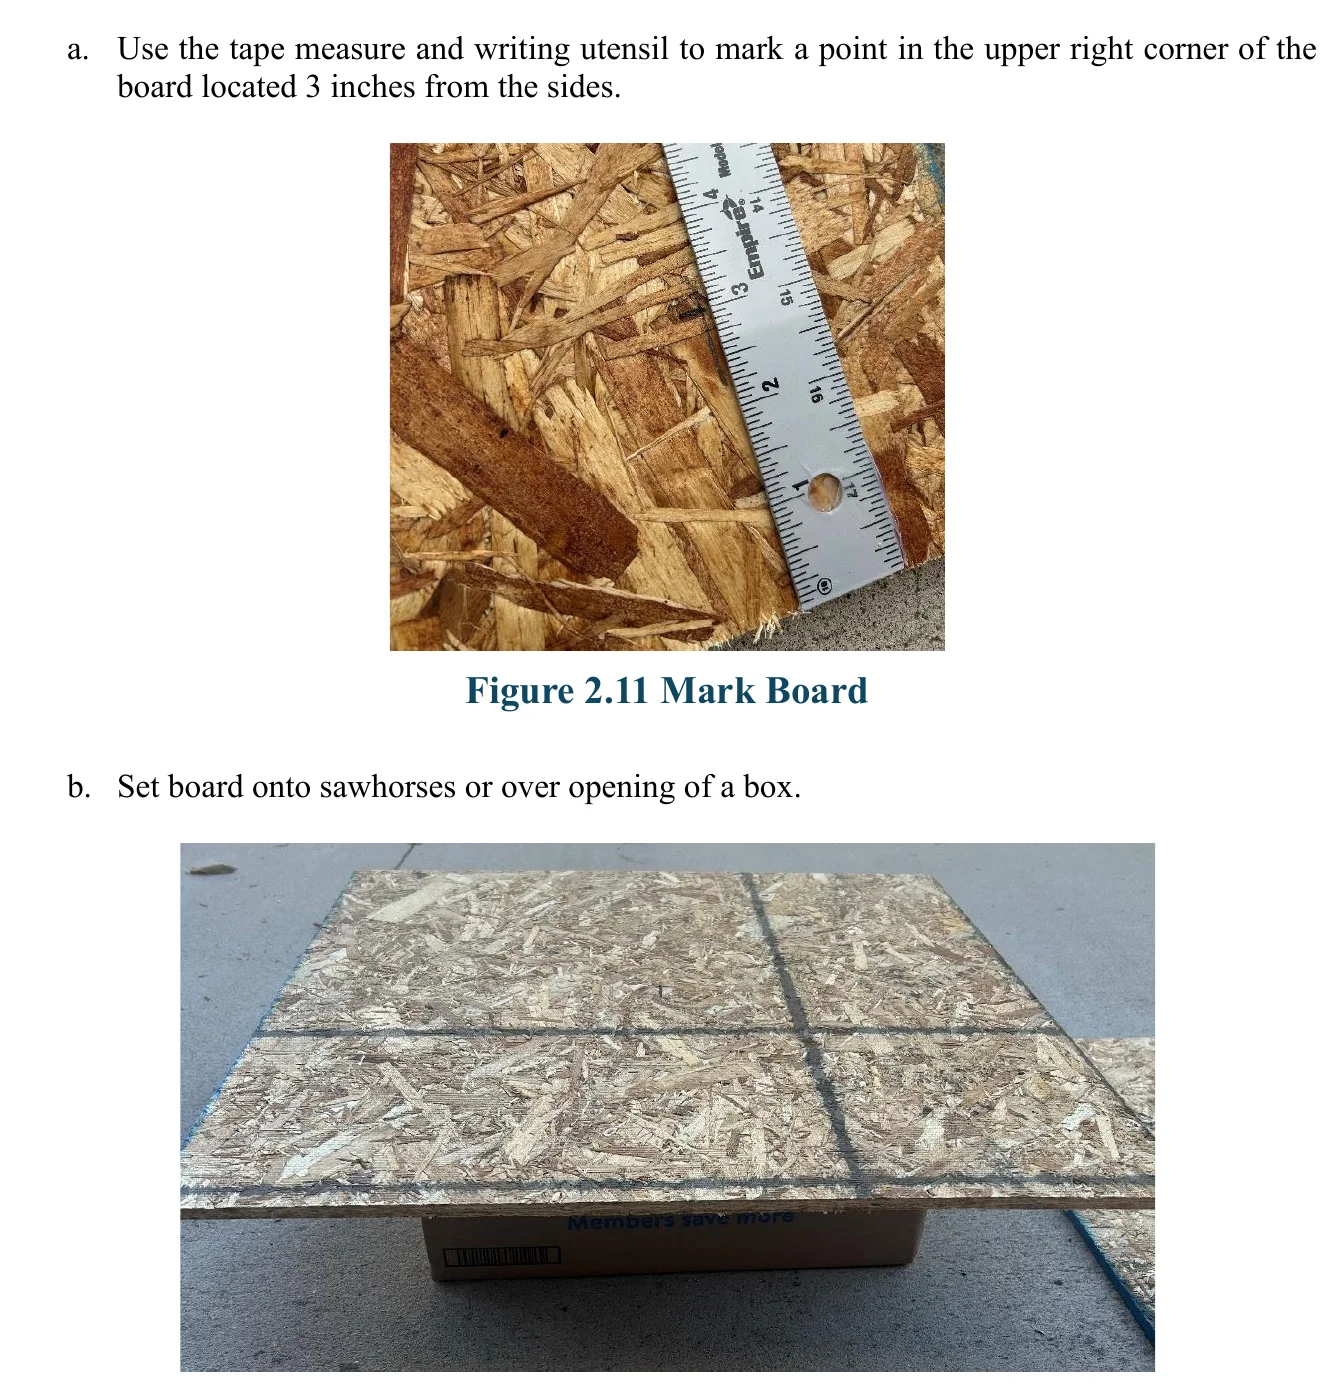
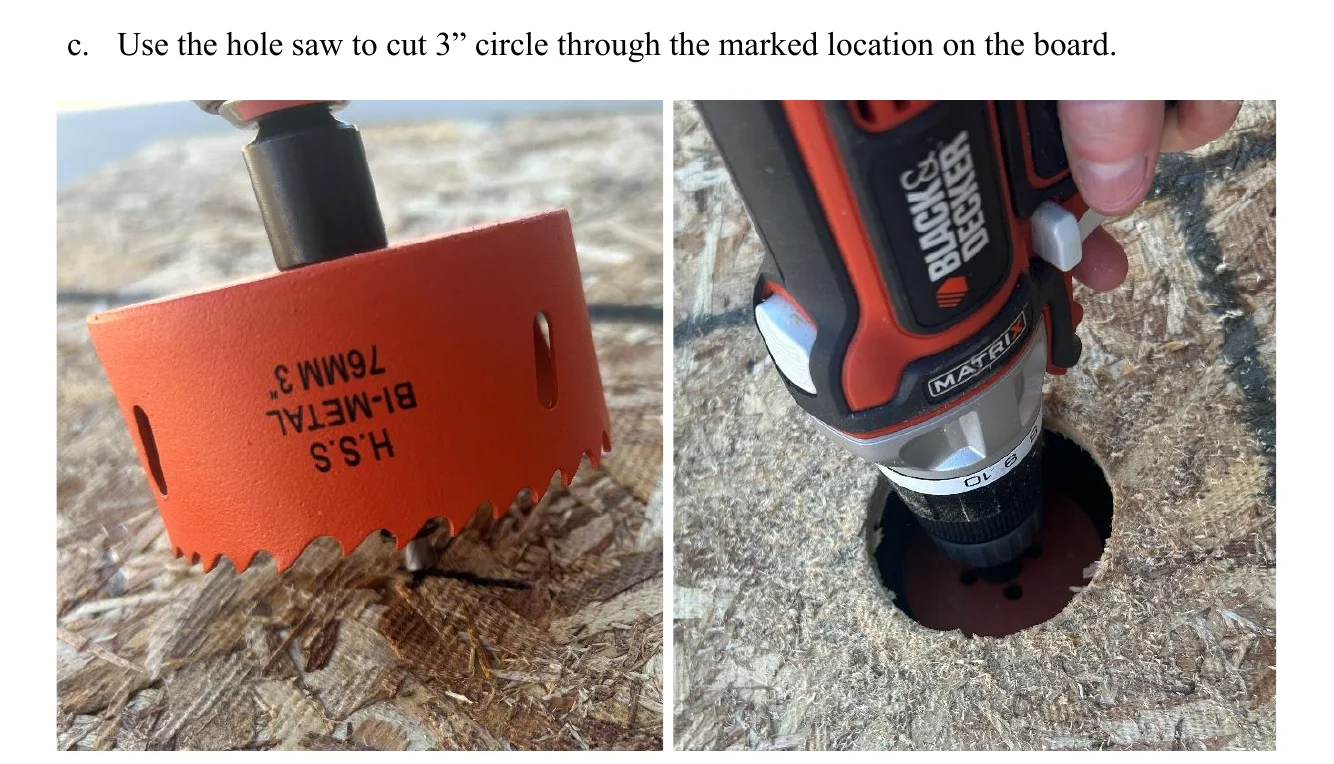
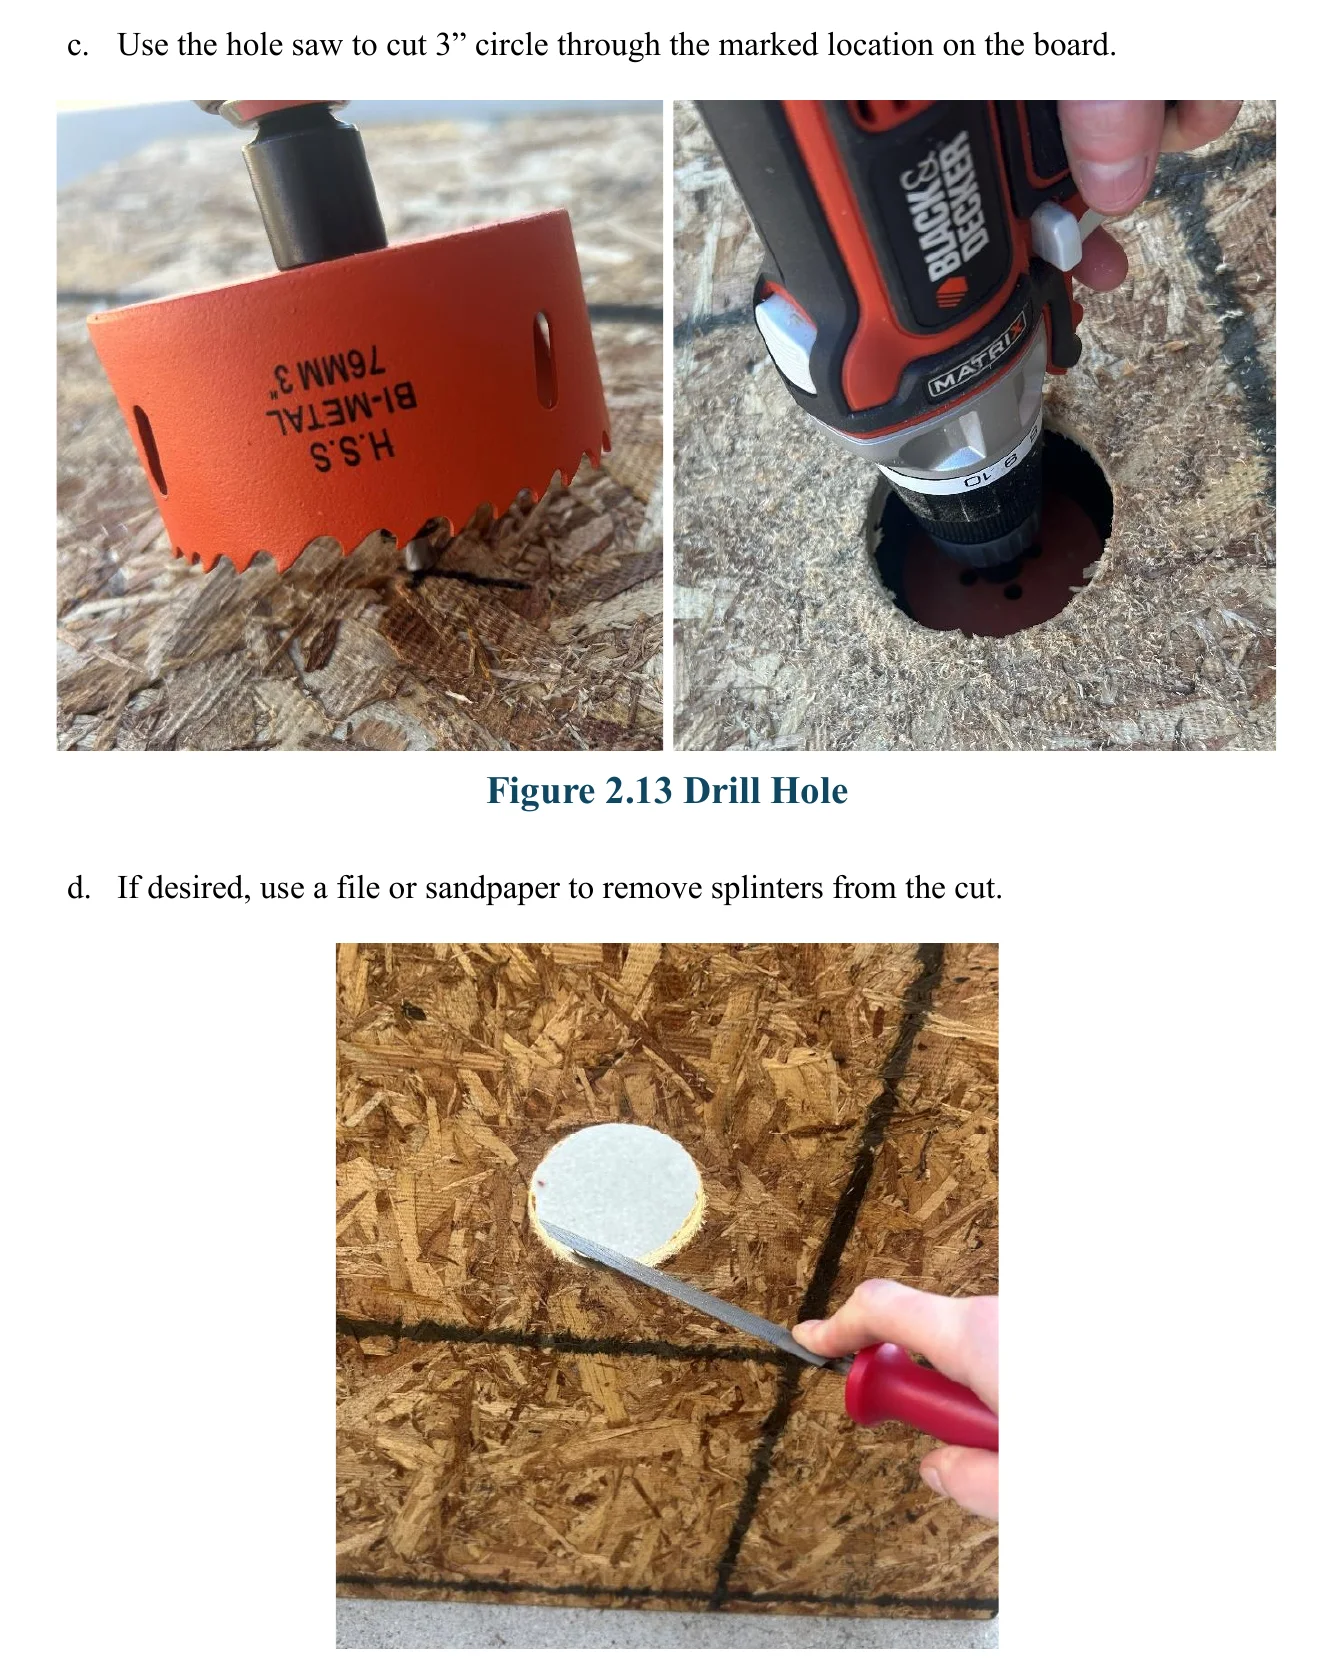
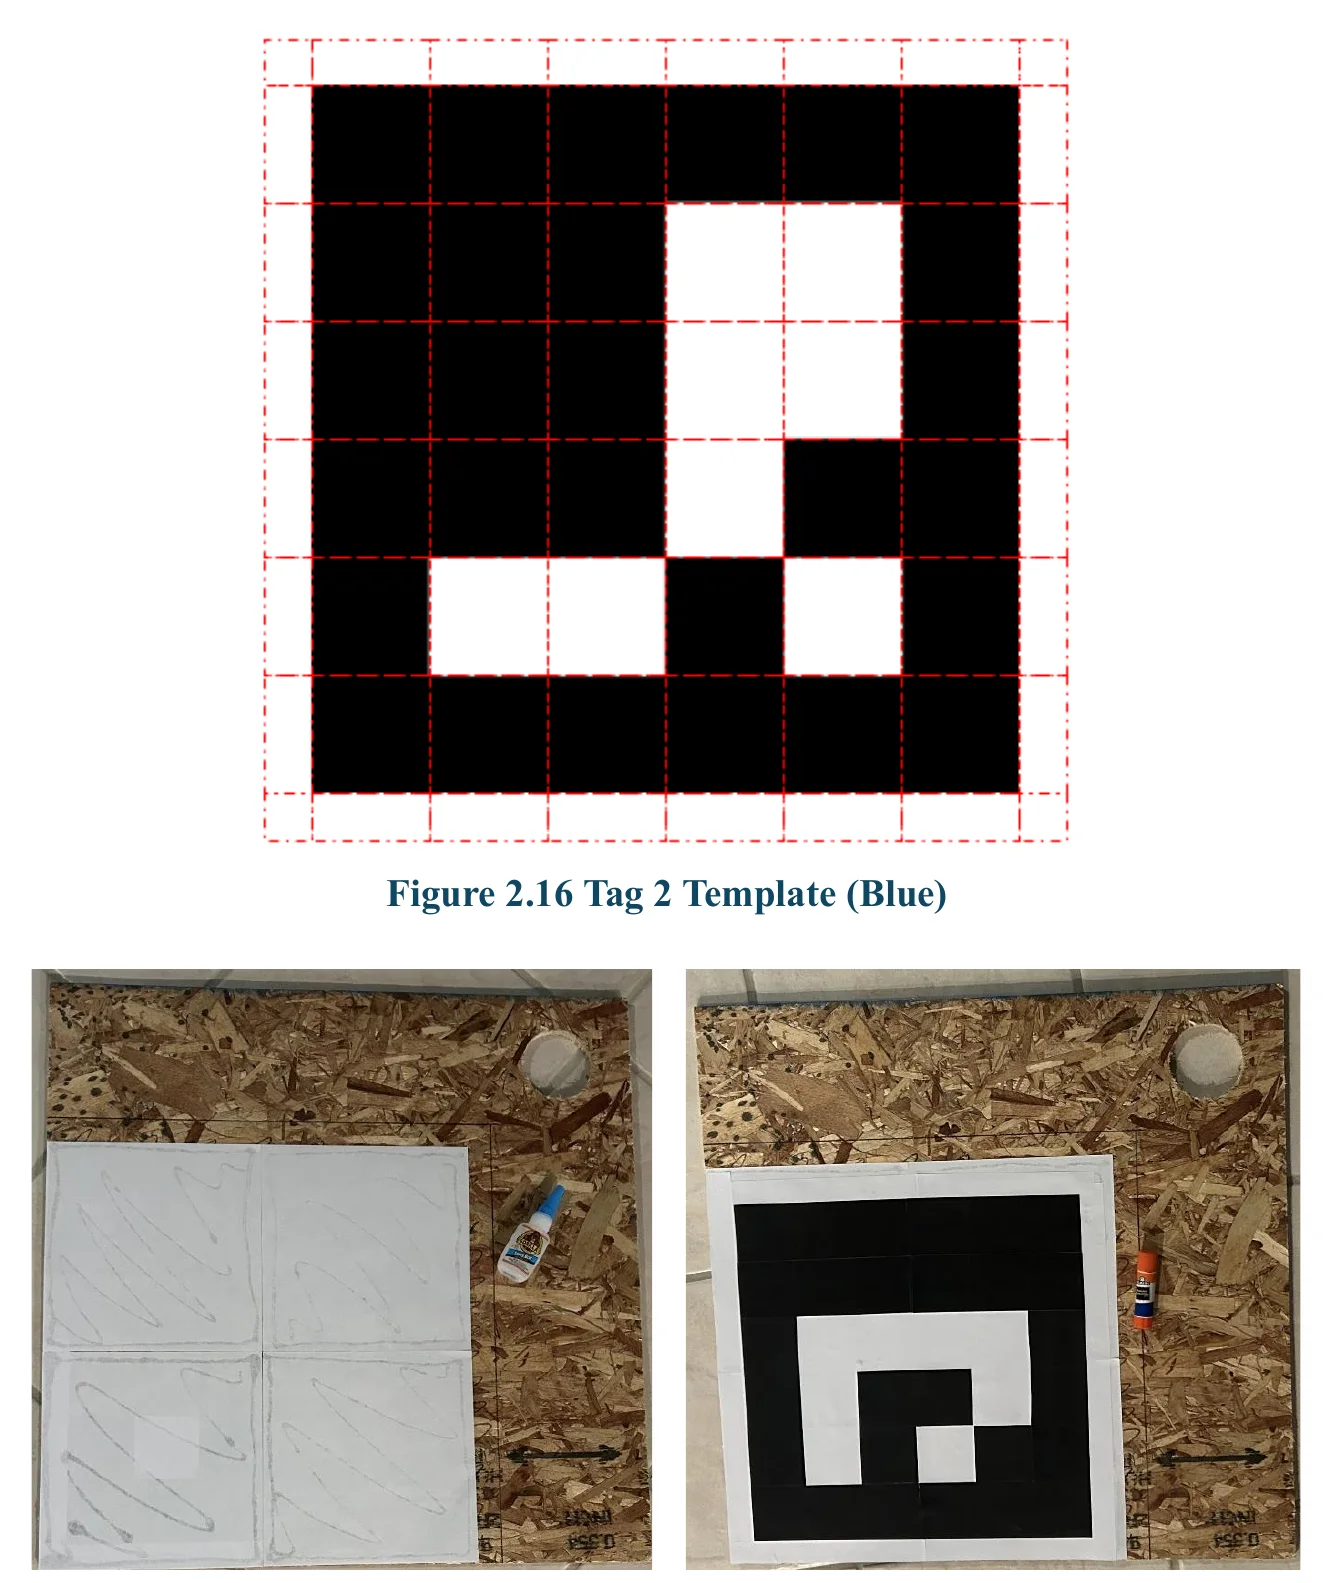
2.1.6Step 2: Add ArUco Tag#
Tags may be created using either paint or paper. While paint (several coats) is most durable, paper is simpler and more affordable, so that method will be demonstrated in this guide.
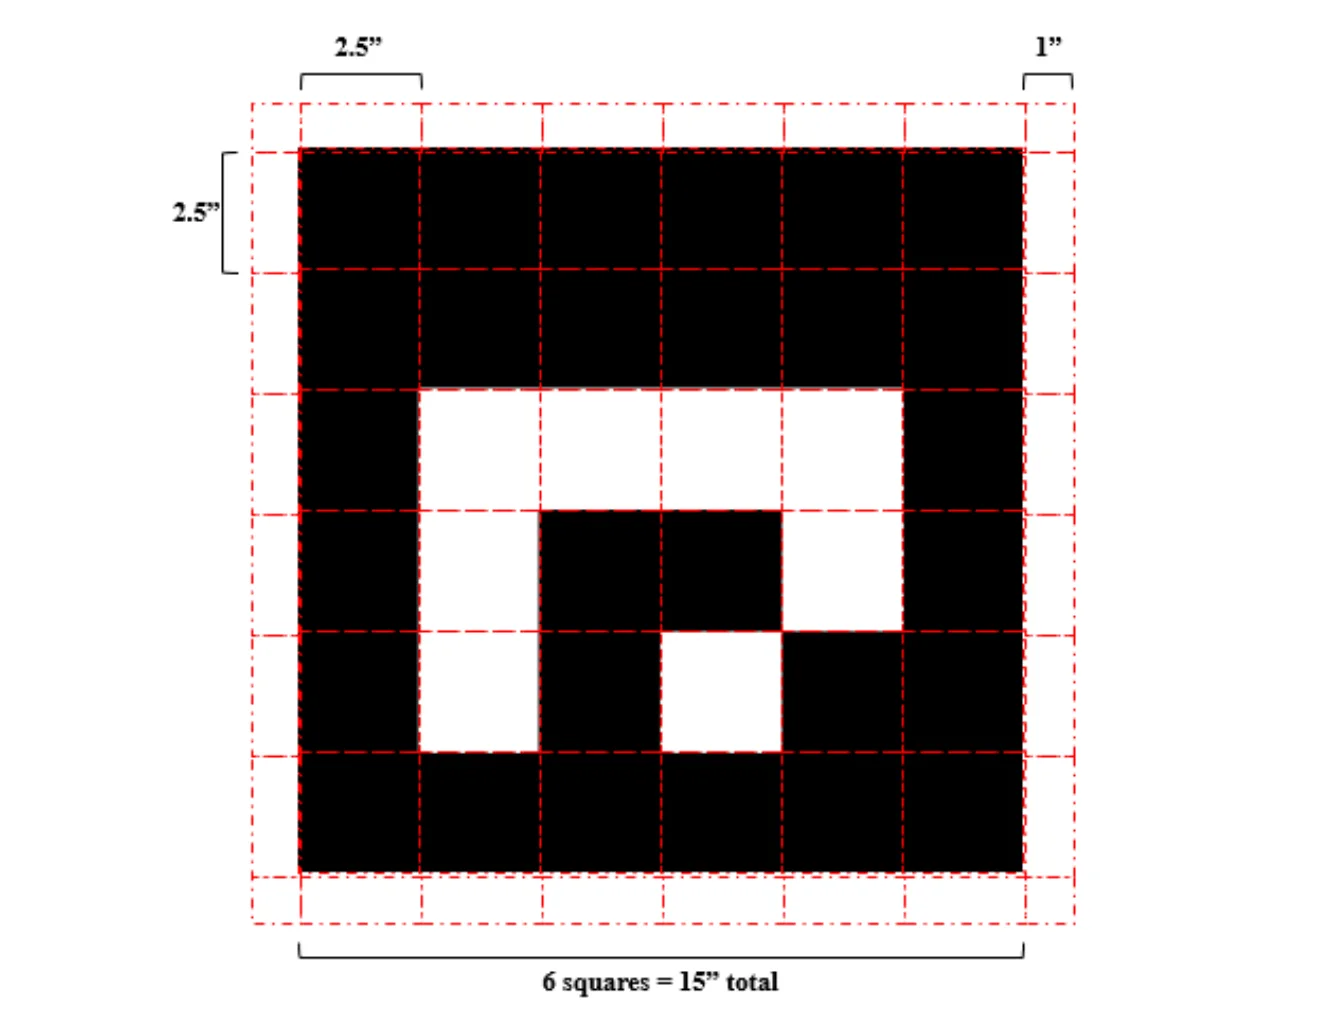
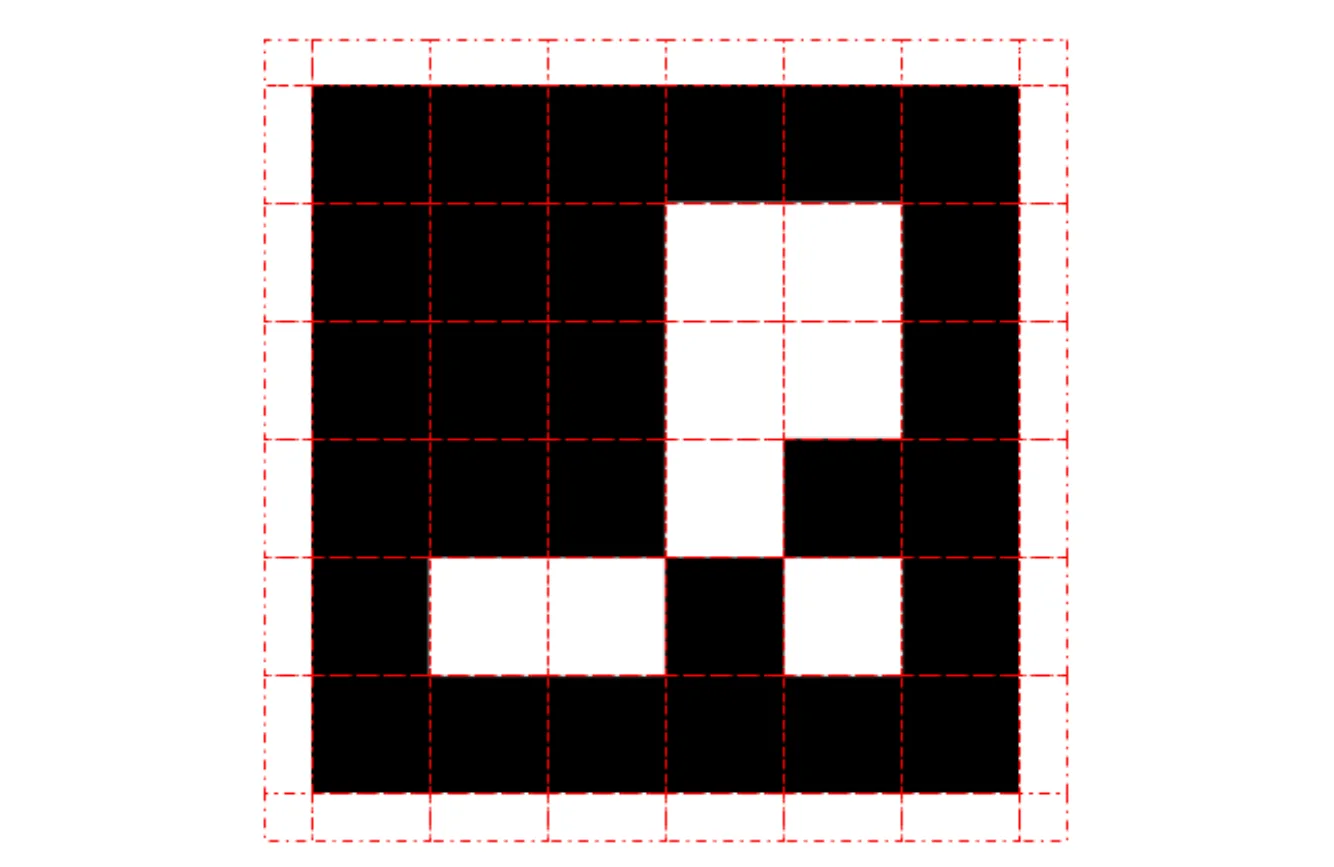
- Print and cut squares (see templates on pages 19-20, or create your own). i. Each square is 2.5” on each side. ii. A 1” border surrounds the tag.
- Adhere the ArUco tag onto the board (see Figure 2.17). i. Align the tag with the lower left corner of the board (opposite corner of the hole). ii. Lay out squares to create the tag.
- Use glue or double-sided tape to attach the squares.
- Recommended: Add waterproof sealant (example).
*Tag interpretation (source): *Tag 1 = the number 1 and corresponds to the RED target (Figure 2.15). *Tag 2 = the number 2 and corresponds to the BLUE target (Figure 2.16).
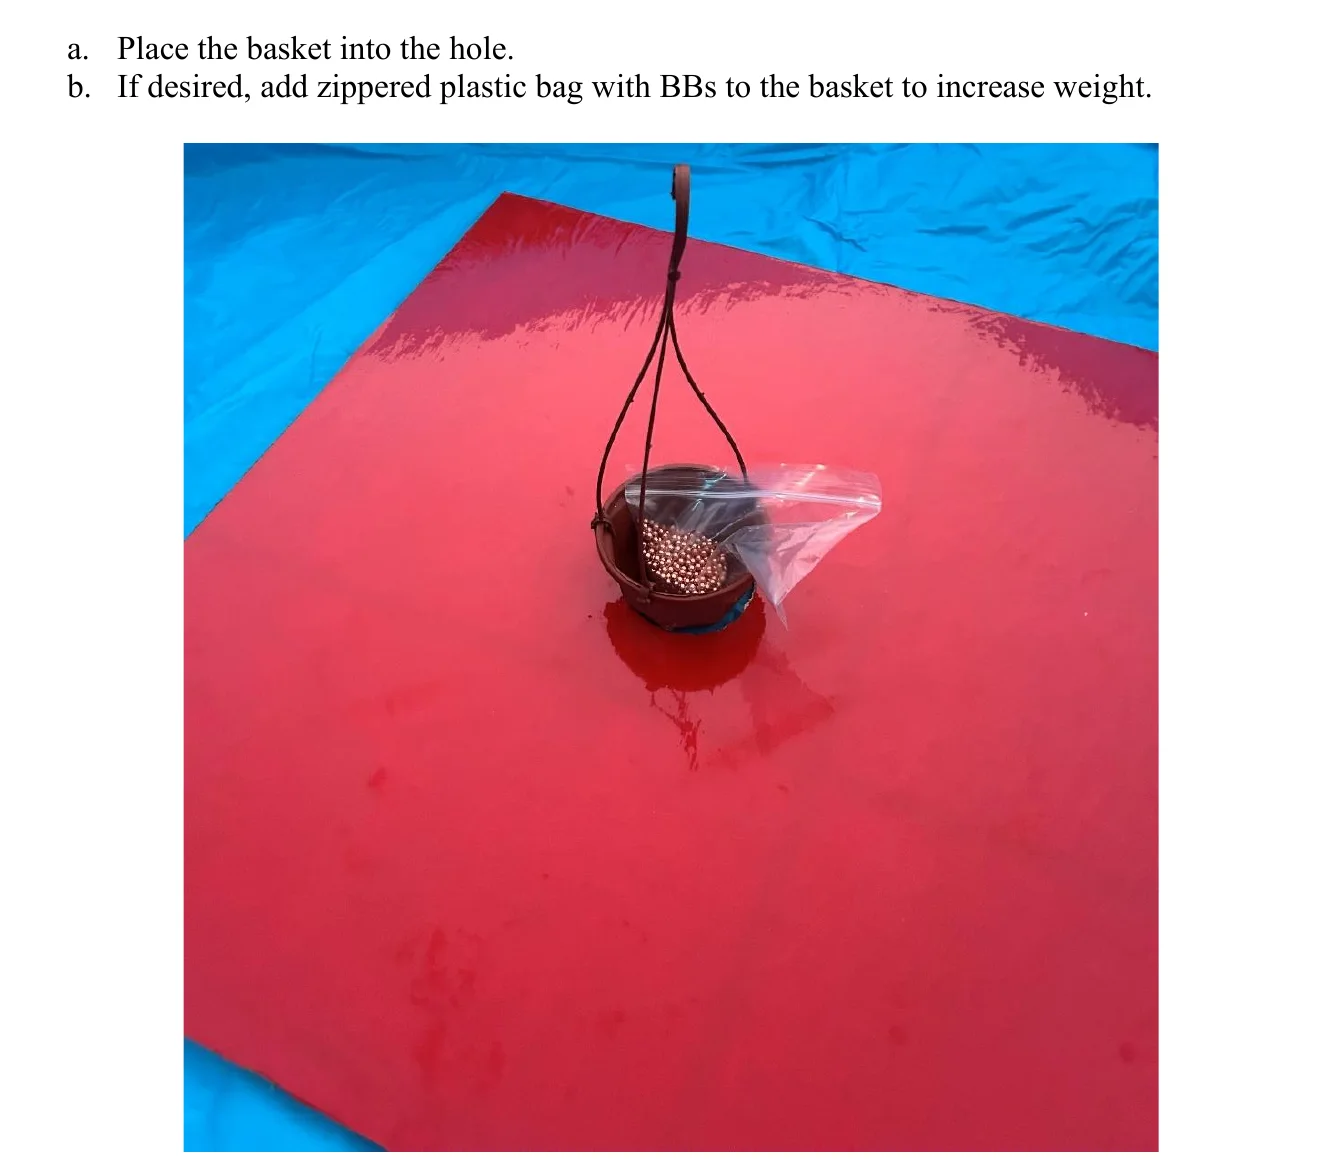
2.1.7Step 3: Insert Basket#
- Repeat Section 2.1.4.
2.2Field Component 5: Tether#
The following materials are needed to build the tether assembly:
- Cinder Block
- Tether Line
- Carabiner
The following tools are needed to build 1 tether assembly:
- Required: o Scissors
2.2.1Step 1: Prepare Tether Line#
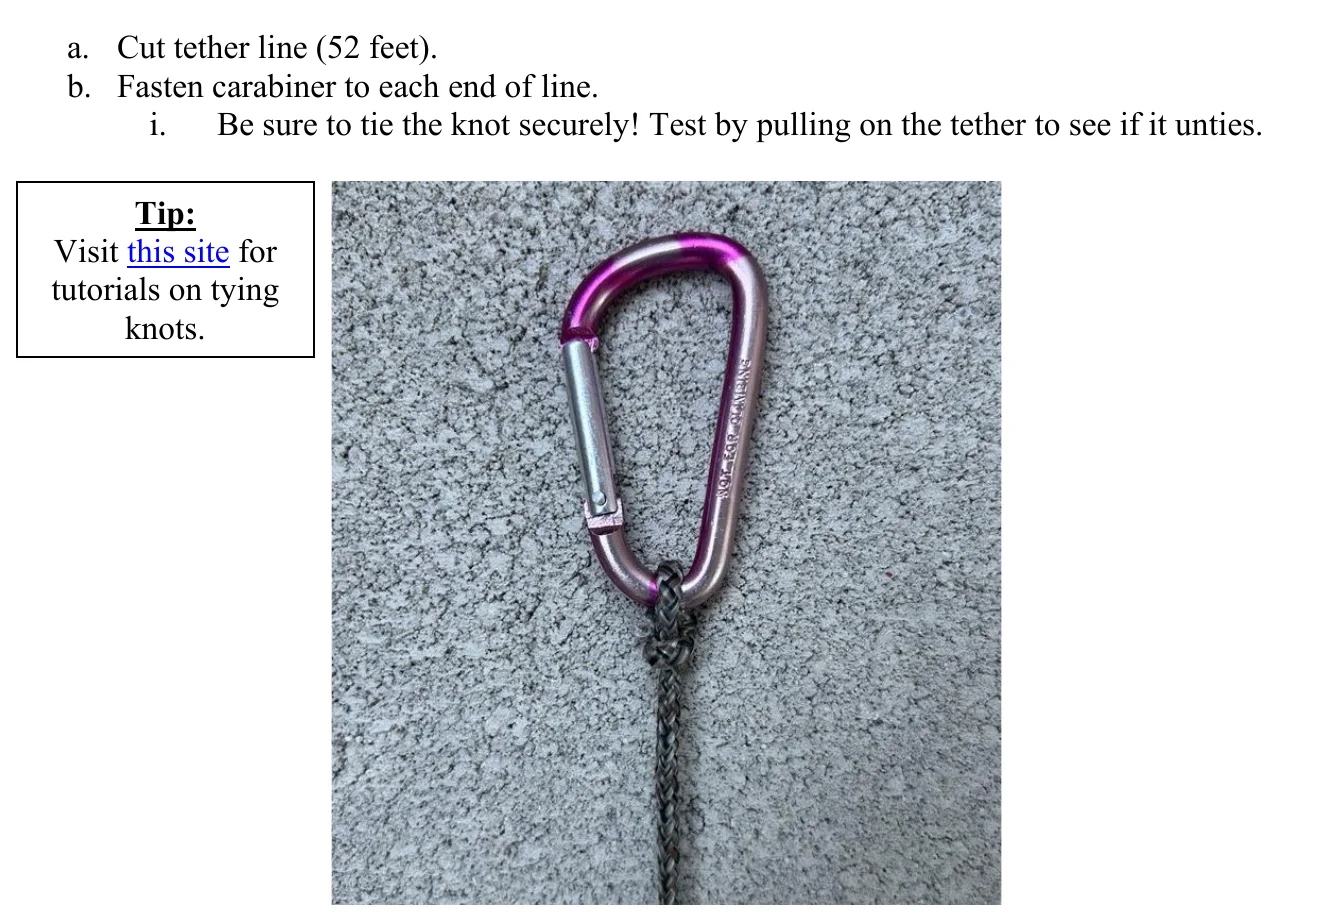
2.2.2Step 2: Assemble Tether#
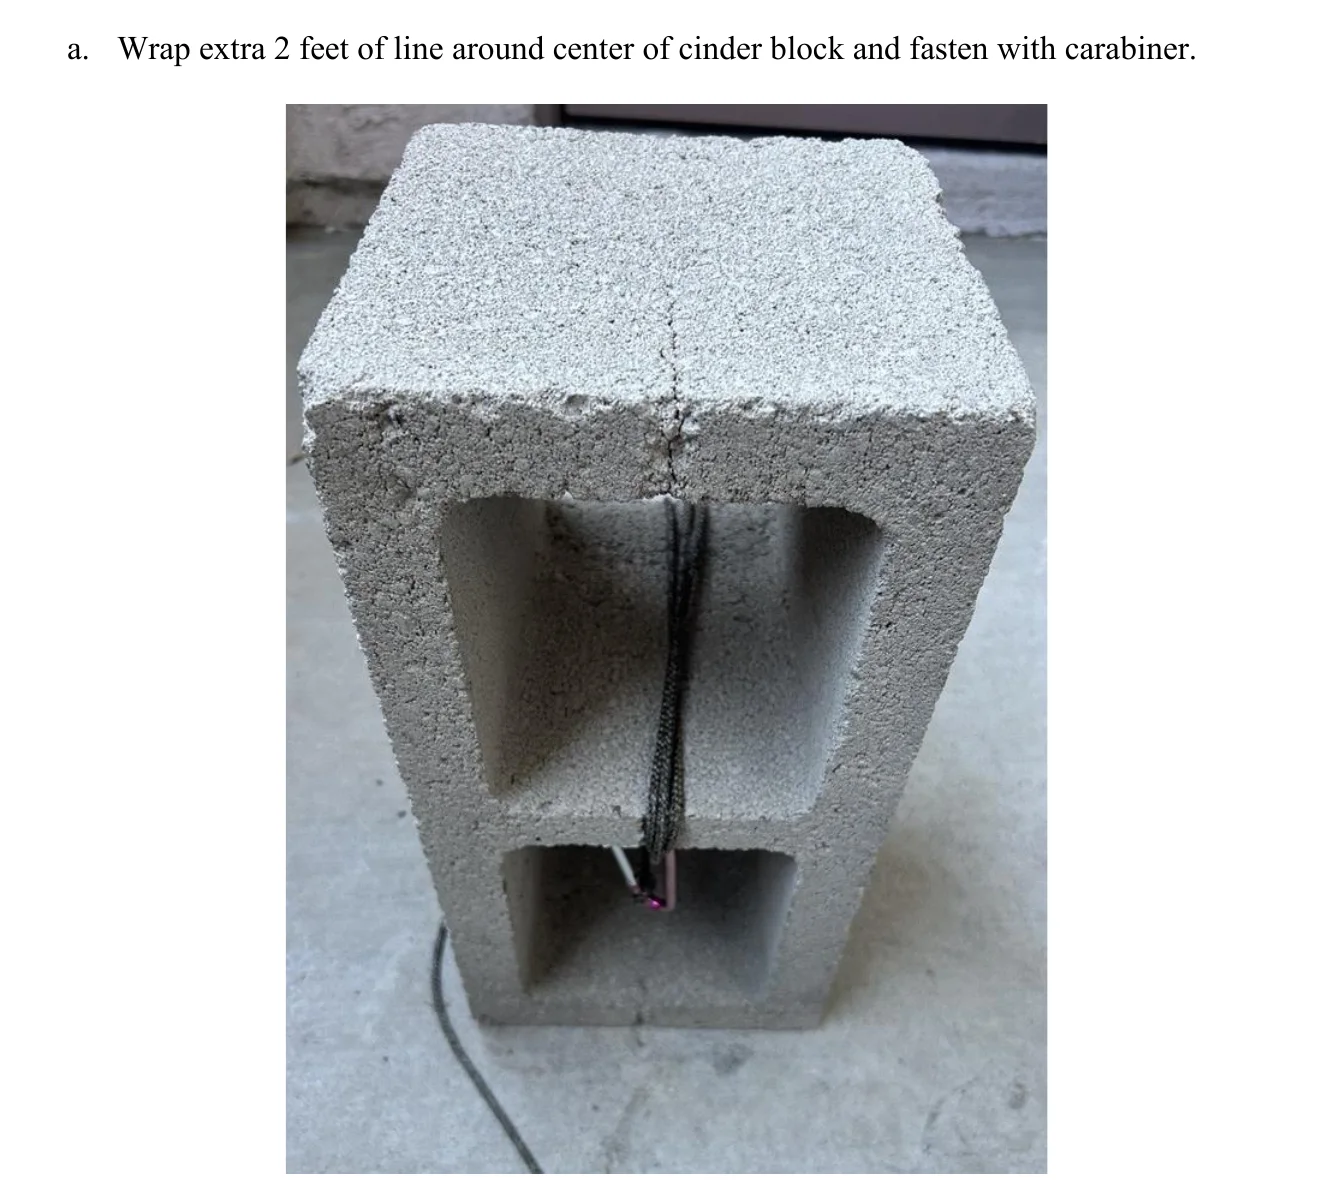
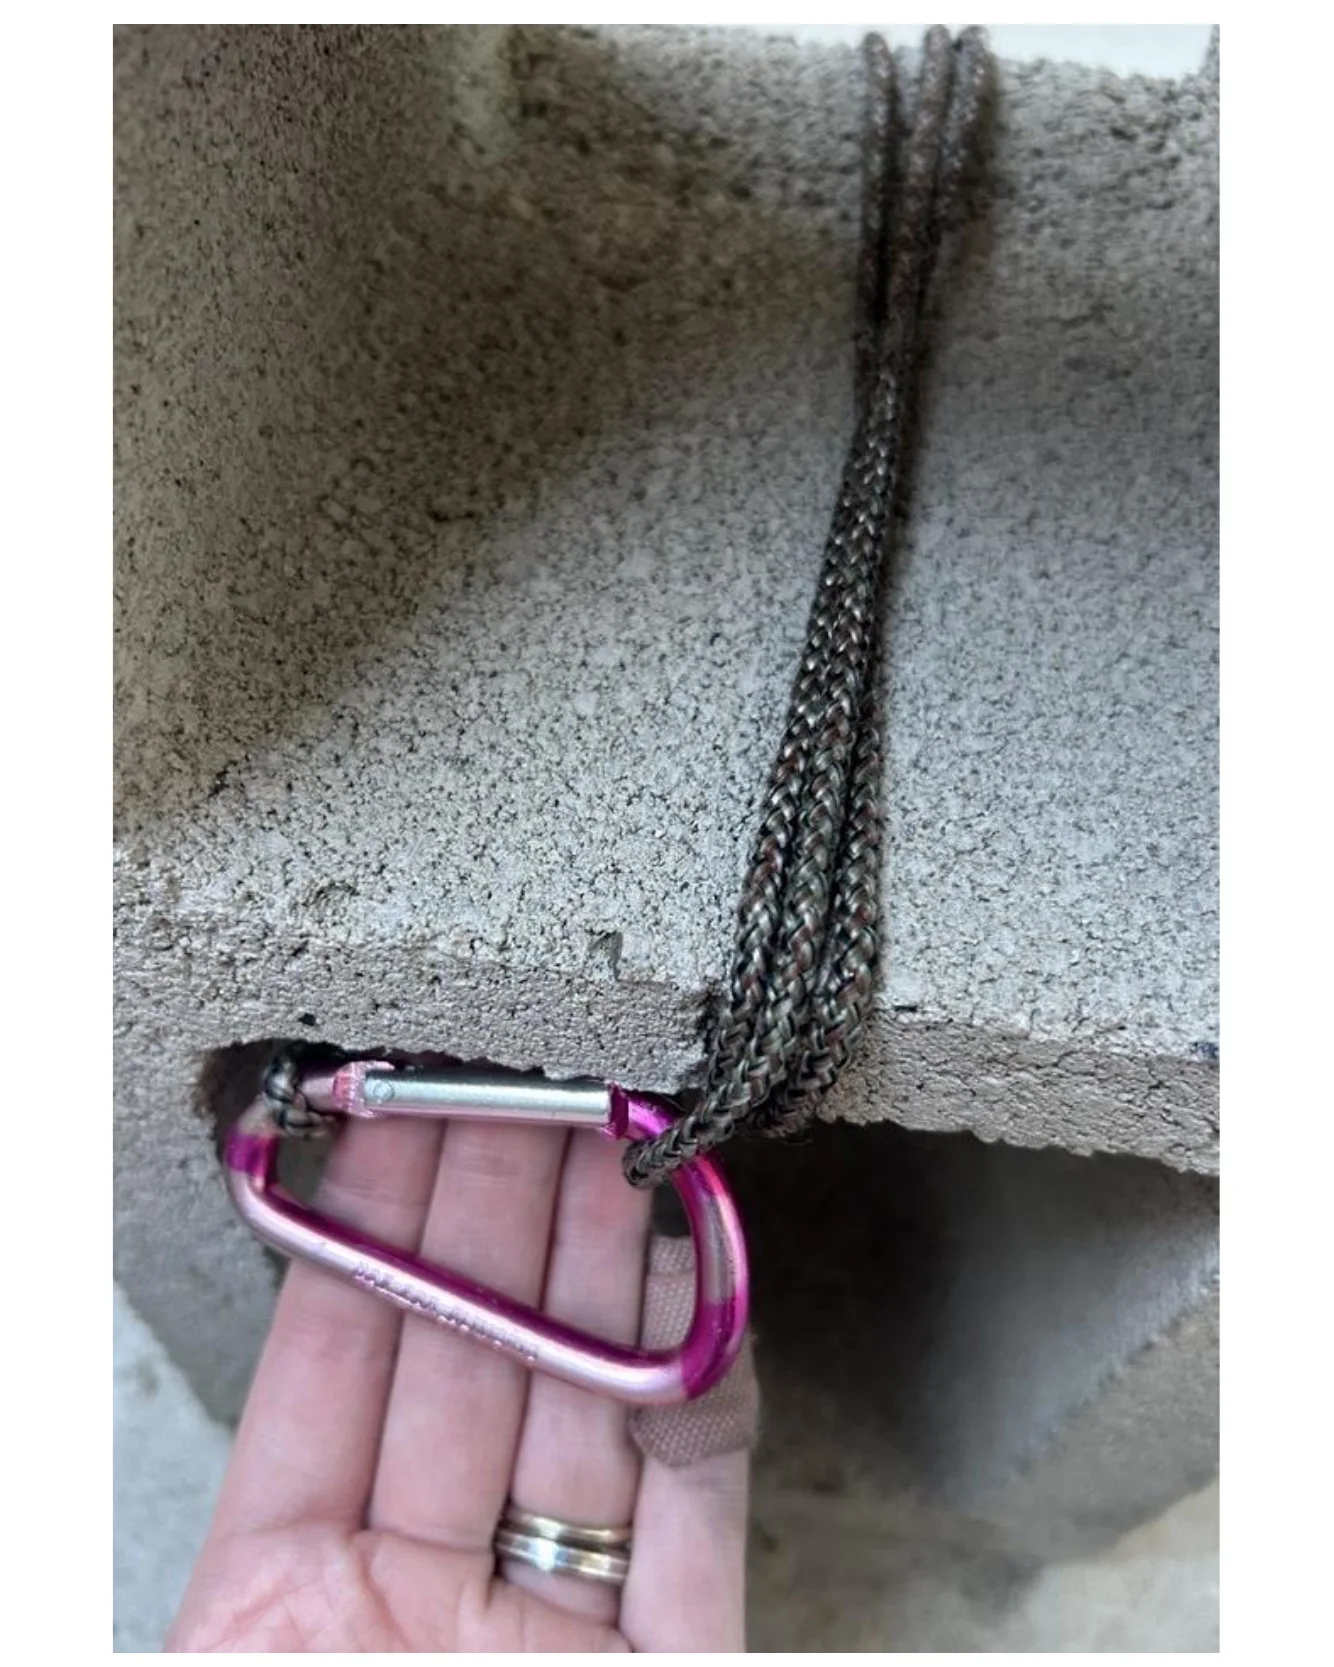
- Use remaining 50 feet of line as tether.
3Mission 2 Components#
Table 3.1 below indicates the components that will be using in Mission 2. The following subsections will provide instructions for building these components.
| Name | Item | Description | Instructions |
|---|---|---|---|
| Payload 2 | Turtle | Stuffed Turtle | NA |
| Payload 3 | Whale Tracker | Foam Puck | NA |
| Field Component 1 | Pool | Pool | NA |
| Field Component 3, Blue | Blue Whale | Colored Board | Section 3.1 |
| Field Component 3, White | White Whale | ||
| Field Component 3, Purple | Purple Whale | ||
| Field Component 5 | Landing Pad | Landing Pad | NA |
| Field Component 6 | Tether | Line & Cinder Block | Section 2.2 |
3.1Field Component 3: Whale#
The following materials are needed to build 1 whale:
- 3/8”x2’x2’ Plywood Sheet x2
- UltraCote, Blue/White/Purple (or Paint)
The following tools are needed to build 1 whale:
- Tape measure
- Writing Utensil
- Scissors
- Drill
- Hole Saw
- Iron (or Adhesive)
3.1.1Follow Instructions from Section 2.1 Step 2#
4Field Boundaries#
Teams should mark field boundaries before flight to ensure no personnel step within the tether range. See below for the competition boundary setup.
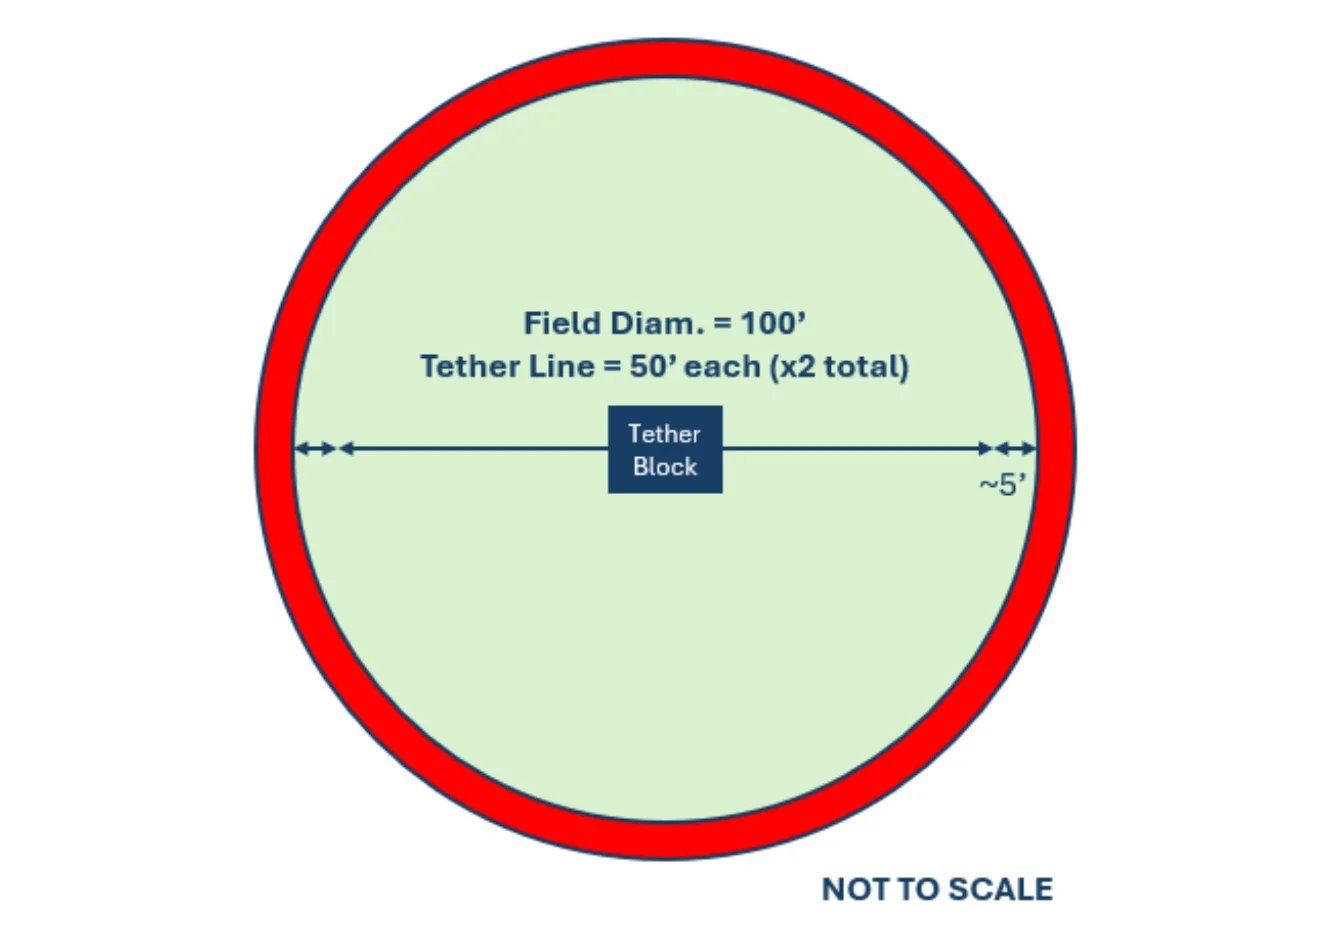
Teams may use any clearly-visible items to mark the boundary, including flags and traffic cones. ARC events will use red and yellow soccer cones.
- Field Boundary = tether length + ~5’ = red cones
- “Red Zone” Boundary = Field Boundary + ~5’ = yellow cones
- Mark Field Boundary by dragging 50’ tether around boundary, then dropping at least 12 red cones evenly around perimeter.
- Mark Red Zone by placing yellow cones approx. 5’ from each red cone.
- Mark Spectator Zone by placing at least 10 blue cones in rectangle.
Revision History
| Revision | Release Date | Notes |
|---|---|---|
| A | 10/04/2025 | Initial Release |
| B | 01/04/2026 |
|